Installation of the onion.net Editor
The requirement for running the onion.net Editor is the server role Webserver (IIS) with activated role service “Application development/ASP.NET “, as well as at least .NET Framework 4.0.
1. Copying the Editor
In this installation, we add the onion.net Editor to the default web page. To do this, copy the directory “onion.net Editor v2” of the distribution into your target directory. In our example this is “ c:\onion.net\web\contoso\editor ”.
2. Create web application
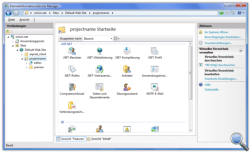
Now open “Internet Information Services manager”.
 2.1. Add virtual directory
If you immediately have the onion.net Editor and not the directory with the project name under “ c:\onion.net\web ”, continue with point 2.2.
Otherwise create a Virtual Directory below the default web page and indicate the project name as the alias and the project directory “ c:\onion.net\web\contoso ” as the path. The created virtual directory will then appear underneath the web page.
2.2. Add IIS application
If you have skipped point 2.1, then right-click on the default web page and click on “Add application” in the context menu.
If have performed point 2.1, then you can expand the virtual directory and right-click on the directory “editor” in order to open the context menu. Now click on “Convert into application”.
In both cases you will now see the same window. Assign the name “editor” for the alias input field. As the application pool, select one which is selected to .NET Framework 4.0 or newer and which is pipeline-mode integrated. For the physical path, select the editor directory. In our example it is the path “ c:\onion.net\web\contoso\editor ”.
If you have clicked on “Convert into application”, all fields will already be pre-filled. Check however whether the selected application pool fulfils the requirements and change the application pool if necessary.
3. Adapt configuration file
Open the file “web.config” from the target directory.
3.1. Configure onion.net Information Server
So that the onion.net Editor is bound against the right information server, the onion.net Information Server must be announced in the configuration file. The attribute server under configuration/onion/editor holds the Uri to the information server. If the instance has not been started under the indicated IP address and port, then the adjustment must be made there accordingly.
3.2. Configure module system
If the module system is activated or is to be activated, you must configure the attribute moduleSystem with the path to the module system (Editor V2/Modulesystem) under configuration/onion/editor.
3.3. Configure management server
The onion.net Management Server is needed for the module system if necessary, in order to provide project DLLs for the editor. For this purpose, the attribute managementServer under configuration/onion/editor is configured. The value must be a remoting-URL. If the service has been installed locally, without changing the port, then the value for the attribute is tcp: //localhost: 8084/onion/management.
3.4. Configure image server
The editor needs the onion.net Image Server for displaying graphics in forms and object structure windows. Graphics are scaled using the server. The configuration of the Image Server takes place in the section configuration/onion/editor. The attribute imageServer must be configured there with a list, separated by blanks, of remoting-urls. If the onion.net Image Server has been installed locally, without changing the port, then the value for the attribute is tcp://localhost: 8083/onion/imageserver. Several onion.net image servers can also be indicated if the onion.net Image Server does not run on the same server and a system stability must be ensured.
3.5. Configure cache directory
An onion.net Render Engine is integrated into the onion.net Editor for the display of parts of the editor. A cache directory must therefore be indicated in the configuration file. This directory is indicated in the attribute rootFolder under configuration/onion/editor/storage.
3.6. Configure tracing for the editor
In the editor, own trace information can be displayed which is created in the routines of the editor. For this purpose, you can activate the latter in the configuration file. Under configuration/onion/editor there is an element “debug” with the attributes enabled and requestLimit. The attribute enabled activates the trace. Using requestLimit it is indicated how many items can be listed in the trace before the oldest items from the trace are deleted.
3.7. Configure preview
So that the preview Render Engine can be called from the editor, the URL to the Render Engine must be announced. The URL is configured under configuration/onion/editor as follows:
A page is configured in the onion.net Render Engine. The web application is configured under http://localhost/contoso/preview . The autoconfig.ashx is a handler which is called in order to check whether the Render Engine is running. If this is not the case, then the preview button is not shown in the editor.
You can now open the onion.net Editor with a supported browser. In our test installation, this is the URL http://localhost/contoso/editor.
3.4. Event logging
log4net is used as event logging. You can consult the configuration options for log4net under log4net.
In the default setting, a log file is created in the current directory under logs\debug.log. Since there is a log directory under “c:\onion.net” in the example installation, this directory can also be indicated, e.g.: “c:\onion.net\logs\contoso\editor.log”.
4. ASP.NET Start health service
Open the Windows service console and start the ASP.NET health service. The onion.net Editor uses this service so that the sessions are kept after restarting the application and the user does not have to log in again.
